LinkedIn AI Headshot Made from a Phone Photo in Nim
Learn how to create a LinkedIn AI headshot from a phone photo in Nim using the Mug shot template, plus checks for likeness, crop and background.
By Nim
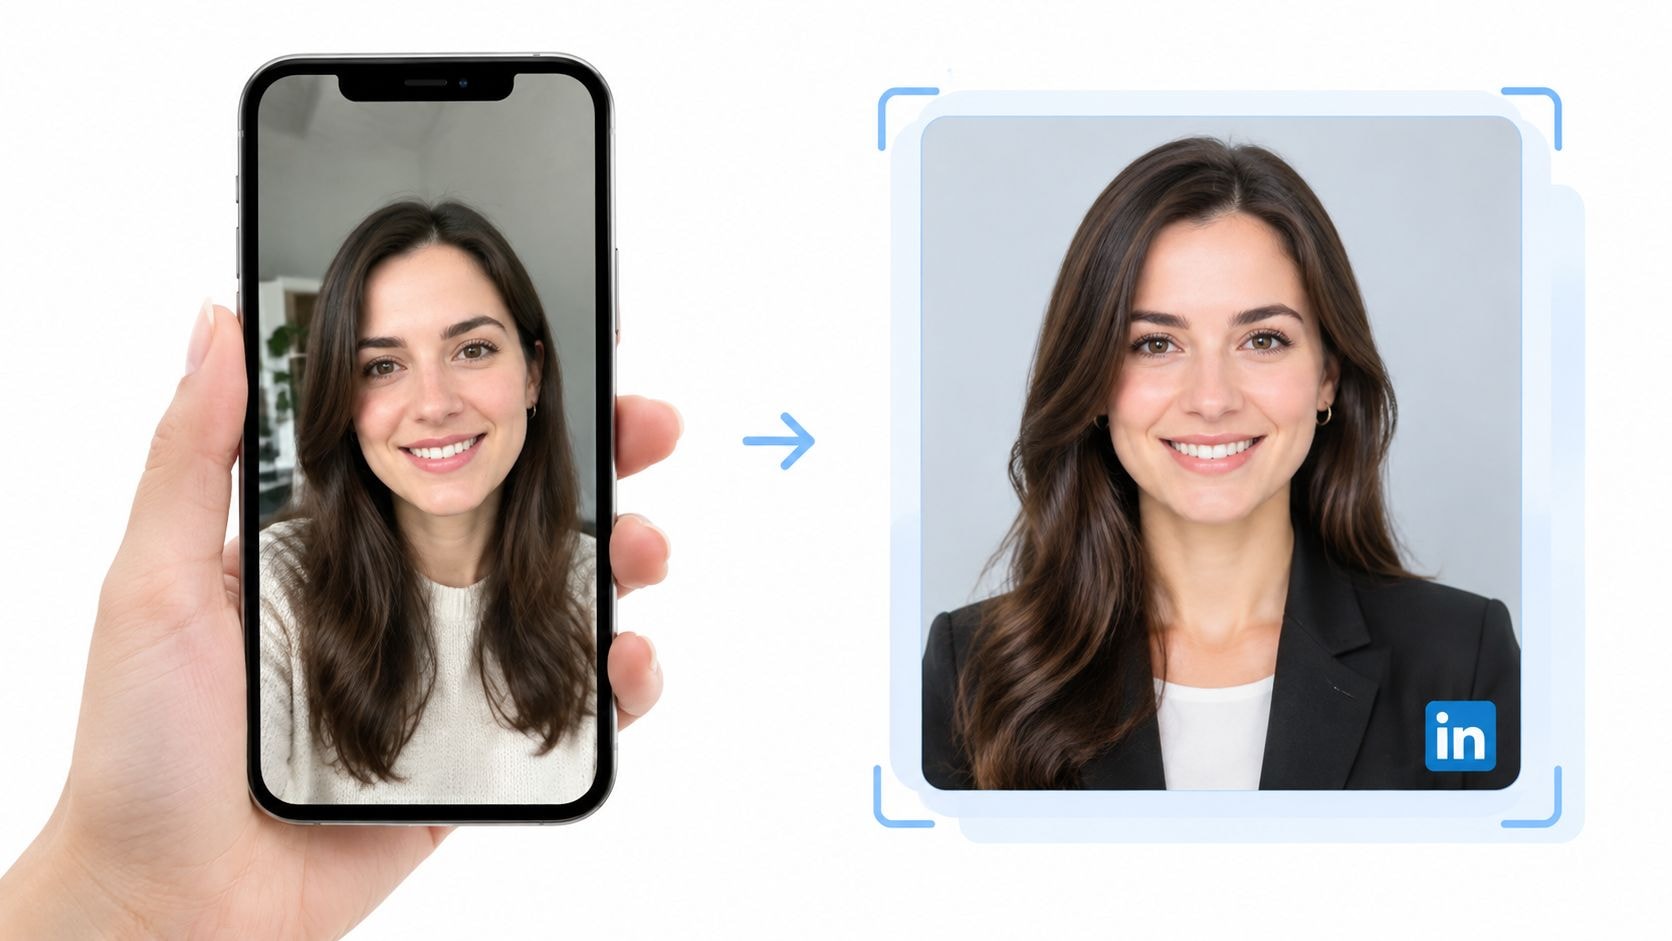
The profile photo is still a casual phone selfie, the lighting is uneven, and the job application deadline is close. A credible LinkedIn AI headshot can be made from a single phone photo in Nim, but the result depends less on dramatic styling than on the quality of the source image and the final likeness check. The practical target is simple: a clean head-and-shoulders portrait that looks like the person a recruiter would meet on a video call, not an over-retouched avatar.
LinkedIn photos matter because they influence how quickly a profile communicates identity and professionalism. LinkedIn-published data is commonly cited as showing that profiles with a photo receive 21 times more views and 9 times more connection requests than profiles without one, as summarized in LinkedIn profile picture statistics. Independent trend analysis also reported a 38% increase in AI-processed or AI-generated LinkedIn headshots between 2023 and 2025, while 47% of professionals identified LinkedIn as their primary reason for needing a headshot, according to the same source.
That doesn't mean the most polished image wins. A portrait that changes the shape of the face, smooths away natural texture, or produces strange glasses can undermine trust. Readers looking for broader profile-photo advice can also elevate your LinkedIn profile photos, but the working principle remains the same here: choose one reliable phone photo, generate conservatively, and approve the image only after checking whether it still looks recognizably like the subject.
Why Your LinkedIn Photo Matters More Than You Think
A professional may have a strong résumé, a clear headline, and recent work to show, yet the profile still opens with a dim selfie taken at arm's length. That image creates a mismatch between the quality of the person's work and the care shown in the first visual impression. Replacing it with a natural-looking headshot can make the profile feel current without changing anything else.
The case for taking the image seriously is not just aesthetic. Recruiter perception research has made AI headshots part of the hiring-screening conversation. In a 2024 Ringover survey of 1,087 US recruiters, respondents correctly identified an AI-generated headshot only 39.5% of the time, although 80% believed they could identify one reliably. The same research reported 29.2% detection accuracy for premium AI headshots, while 76.5% of recruiters preferred AI-generated headshots in blind comparisons, even though some said they would react negatively if they knew the image had been made with AI. These figures are reported in LinkedIn AI headshot research.
The useful definition of professional
A LinkedIn-ready portrait doesn't need to look expensive or heavily staged. It needs to satisfy three practical tests:
- Recognition: The eyes, face shape, hairline, glasses, and other distinctive features should match the person.
- Context: The clothing, expression, crop, and background should make sense for the person's work.
- Restraint: Retouching should improve clarity without turning normal skin, shadows, or facial asymmetry into artificial surfaces.
A person who has recently refreshed a profile photo may also benefit from understanding why LinkedIn's profile photo guidelines focus on likeness. LinkedIn allows artistic renderings, but the image still needs to reflect the person. Logos, emojis, scenes, animals, text-heavy graphics, and another person's likeness don't meet that basic expectation.
Practical rule: If a colleague could identify the subject immediately but a video-call comparison feels noticeably different, the image needs another review.
The workflow is therefore narrower than “make a beautiful AI portrait.” The task is to prepare a sound input, use Nim's Mug shot workflow, inspect the generated face and edges, then crop the accepted result for LinkedIn. That sequence protects credibility better than adding more polish.
What Makes a Phone Photo Work for an AI Headshot
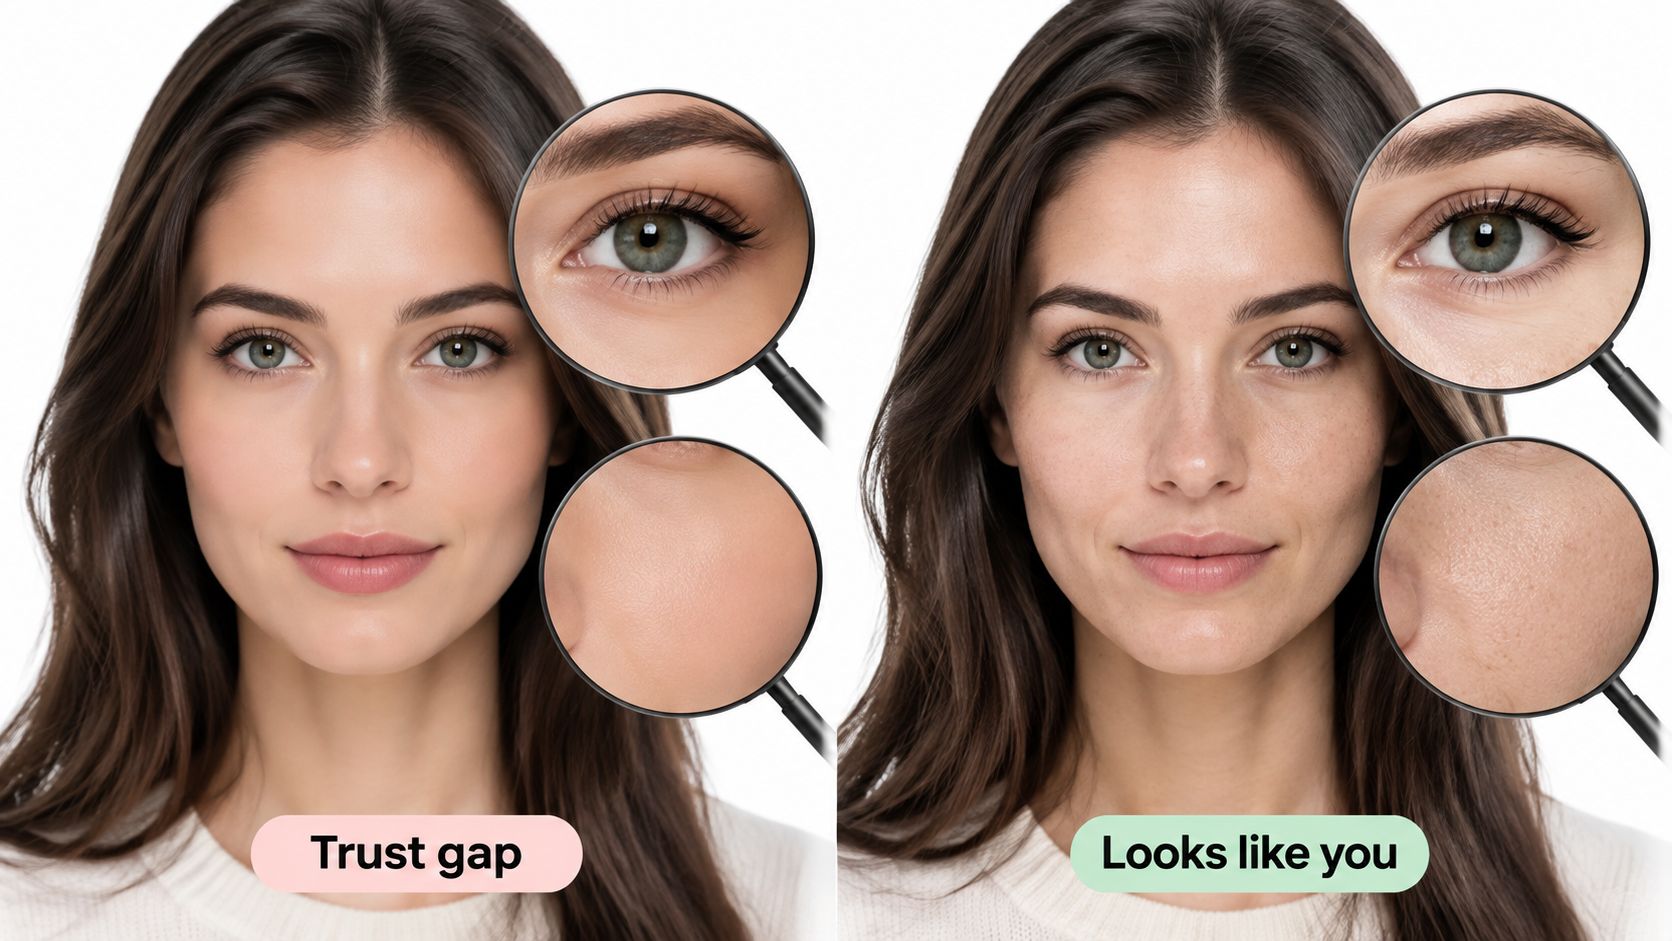
The source photo carries the identity information that the generated portrait has to preserve. A clean, front-facing image with visible eyes and natural proportions gives the workflow useful detail. A blurred selfie, heavily filtered face, or extreme angle forces the result to infer too much, which is where warped accessories, plastic skin, and unfamiliar facial structure can appear.
Choose light before choosing style
Soft, even light is the safest starting point. Face a window or another broad light source rather than standing beneath a ceiling fixture. Hard side light can place one eye in deep shadow, while direct overhead light can exaggerate the brow and eye sockets. The goal isn't a flawless studio setup. It's a face with readable contours and natural skin tone.
A quick home or office setup can follow this sequence:
- Stand facing soft light. Keep the face evenly illuminated and avoid bright windows directly behind the subject.
- Use a moderate camera distance. Step back instead of holding the phone very close, because a wide-angle perspective can enlarge the nose and alter facial proportions.
- Keep the phone near eye level. A steep upward or downward angle changes the jawline and chin.
- Use a plain background. A quiet wall is easier to interpret than shelves, plants, cables, or other people.
- Look toward the lens. Clear eye contact and a slight, natural smile fit LinkedIn's own photo guidance, which also recommends a neutral background and a high-resolution image. The relevant composition advice appears in LinkedIn's professional profile picture guidance.
Frame for the final crop
The safest source is a head-and-shoulders photo with room around the hair and shoulders. LinkedIn recommends a crop from the top of the shoulders to just above the head, with the face taking up at least 60% of the frame, as described in its official profile-photo advice. The source doesn't need to be square yet, but it shouldn't cut into the hair, ears, or jacket.
Avoid heavy filters, beauty effects, sunglasses, group shots, dramatic color casts, and photos where hair or glasses are partly hidden. Clothing should be clean and appropriate to the intended professional context, but the source should still resemble how the person normally presents themselves. A simple shirt, blouse, jacket, or sweater usually gives the generated portrait fewer distracting details to reinterpret.
A good input is not the most glamorous phone photo. It's the one that gives the face the clearest, most ordinary representation.
How to Generate Your Headshot in Nim with the Mug Shot Template
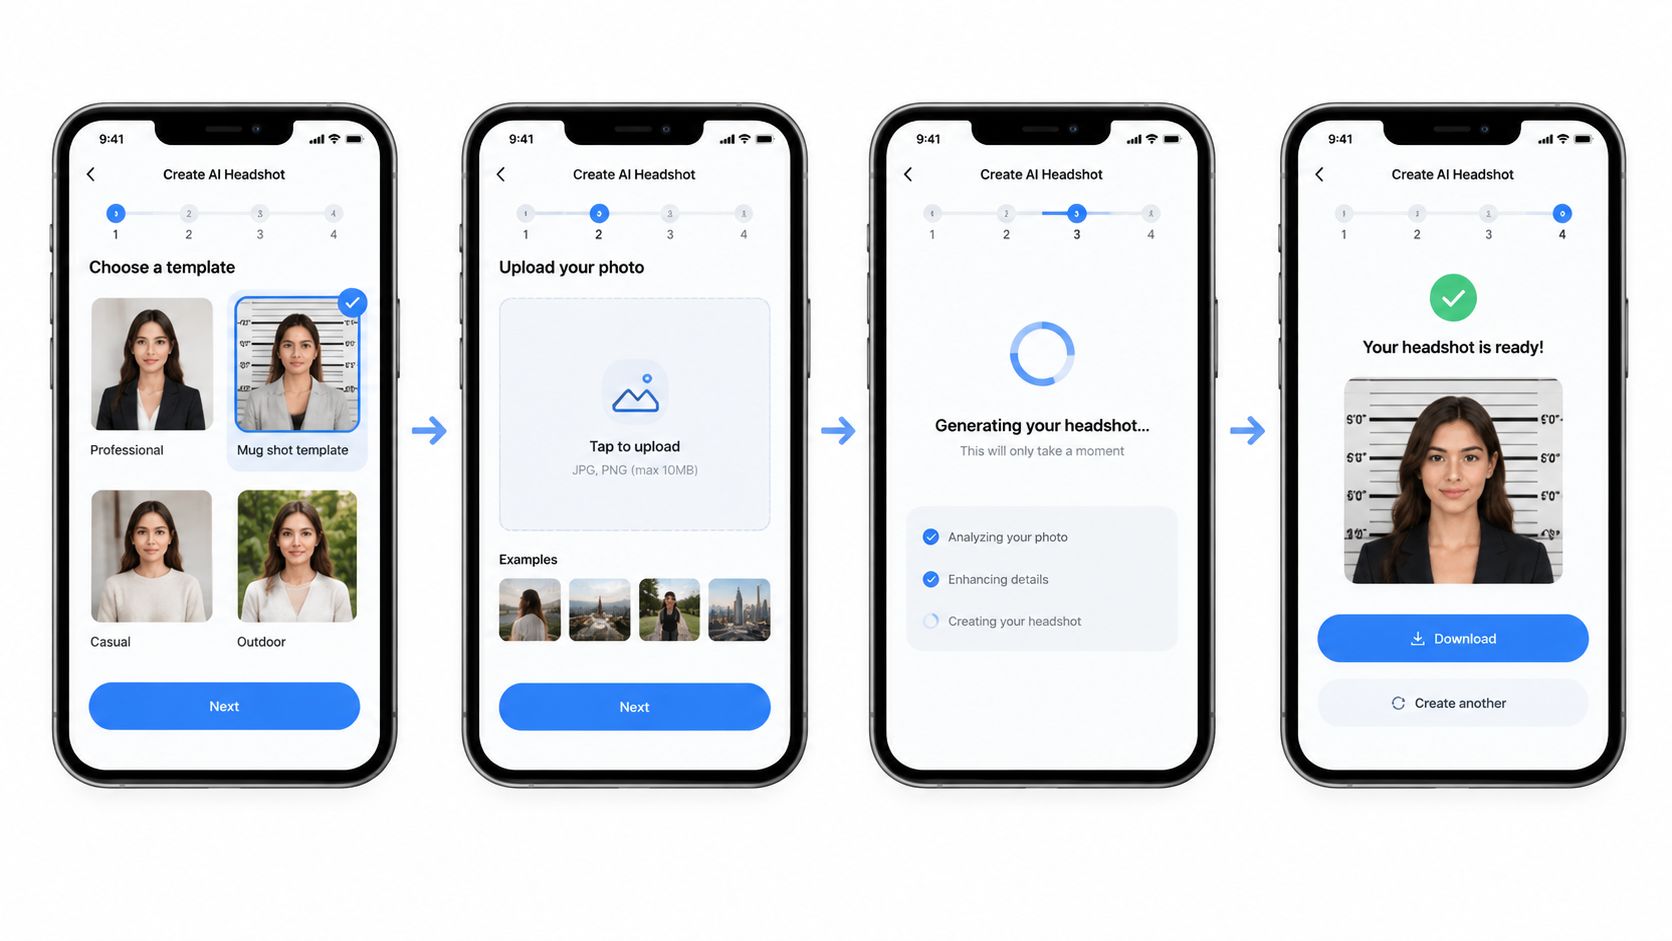
Once a suitable phone image has been selected, the generation process should remain straightforward. Open the Mug shot template in Nim, provide the input requested on that template page, generate the image, review the result, and download it if it passes the likeness check.
The related Nim guide to creating a mug shot can provide additional context for the workflow. For a more conventionally business-focused result, the Professional headshot and Corporate portrait pages are also relevant starting points, but the Mug shot template is the direct route for this task.
Prepare the input before opening the template
The most useful preparation happens outside the generation step. Select the phone photo with the clearest eyes, the least distortion, and the most representative expression. Don't choose an image merely because the subject likes the pose if the face is obscured by shadow or a filter.
A practical selection test is to reduce the photo to a small thumbnail. If the face still reads clearly and the expression feels approachable, the source is probably stronger than a larger but blurrier image. Check glasses, earrings, facial hair, hairline, and any visible marks before submitting the photo. Those details are part of identity, not visual clutter.
The template page determines what input it requests. The workflow should follow that page rather than relying on assumptions about controls, prompts, pricing, file settings, or export choices. Provide the requested source, start generation through the available template flow, and wait for the resulting portrait.
Treat the first result as a draft
The first generated image is a candidate, not an automatic approval. Review the face at a useful size, then compare it with the original phone photo. If the eyes, mouth, nose, jaw, or hairline feel unfamiliar, the problem usually isn't solved by accepting a more polished background.
A better next move is to use a stronger source photo if the template allows another generation. Choose an image with clearer lighting, a less extreme camera angle, and fewer accessories that could be misread. A natural result with ordinary skin texture is more valuable for LinkedIn than a dramatic portrait that makes the subject appear substantially younger, slimmer, or structurally different.
Download the result only after this review. The downloaded file then moves to the separate LinkedIn cropping and upload stage.
How to Check That Your Result Still Looks Like You
The critical review question is not “Does this look impressive?” It is “Would someone who knows this person recognize the image without explanation?” A generated portrait can appear attractive at first glance while failing that test in small but important ways.
Place the source phone photo and the generated result side by side. Compare stable features first, including the spacing of the eyes, the shape of the nose, the width of the jaw, the hairline, and the natural position of glasses. Then check the expression and apparent age. A different pose is acceptable. A different identity is not.
Inspect the artifacts that damage trust
The most suspicious results often fail around the face's boundaries or in details that people recognize subconsciously. Check each area deliberately:
- Skin texture: Natural skin has variation. Plastic smoothness, waxy highlights, or a painted finish can make the portrait feel synthetic.
- Glasses and accessories: Look for bent frames, uneven lenses, melted arms, duplicated earrings, or jewelry that changes shape between sides.
- Hair and clothing edges: Halos, fuzzy cutouts, and bright outlines around hair, shoulders, or jacket collars suggest aggressive processing.
- Lighting direction: The face, hair, neck, and clothing should appear to share the same light. Unnatural highlights or shadows can make the subject look composited.
- Video-call comparison: Open a recent video-call image or camera preview and ask whether the generated portrait still feels like the same person. It shouldn't need to match every detail, but the overall face should be familiar.
LinkedIn's own trust-and-safety research, summarized in coverage of synthetic-face detection, indicates that older detection methods trained on GAN-generated faces don't generalize reliably to many diffusion-based outputs. That isn't a reason to chase an image that can evade detection. It reinforces the more useful standard: preserve likeness, keep the portrait photorealistic, and avoid artifacts that invite suspicion.
Privacy deserves a separate check before any face image is reused across public profiles. Readers managing their broader digital exposure can review these face search privacy protection tips before publishing a new portrait.
Decide whether to keep or regenerate
Keep the result when the face is recognizable, the details are coherent, and the styling doesn't overpower the person. Regenerate with a better source when the portrait changes facial structure, mishandles glasses, or creates a polished but unfamiliar version of the subject. If the only issue is a minor crop or background distraction, that belongs in the finishing stage rather than a new identity-generation attempt.
Polishing and Cropping for LinkedIn Upload
Polish should correct presentation problems, not redesign the face. If the generated portrait has a distracting background, a background-replacement step may create a plain neutral setting. If the image is soft, an image-enhancement step can improve clarity, and an upscale step may help when the selected file needs more working resolution. Each adjustment should be judged at normal profile-thumbnail size, where excessive sharpening and smoothing become obvious.
Keep the finishing pass restrained
A neutral background usually supports recognition better than a highly staged office scene. Background replacement can be useful when the original setting is busy, but edges around hair and shoulders need inspection afterward. Enhancement can recover apparent clarity, yet it shouldn't erase pores or introduce brittle detail. Upscaling can enlarge an image, but it can't repair a face that was already generated incorrectly.
For a separate resizing step, the Nim image resize workflow is relevant. The exact finishing path depends on the image and the available workflow, so the subject should review the result after every change rather than applying several edits without checking.
Crop for LinkedIn's profile shape
LinkedIn's documented guidance points to a 1:1 square image, with a minimum recommended size of 400 × 400 pixels, maximum dimensions up to 7,680 × 4,320 pixels, and an 8 MB file-size cap, as summarized in LinkedIn profile photo specifications. The practical crop is still the important part: keep the head from touching the top edge, include the shoulders, and let the face occupy at least 60% of the frame, following LinkedIn's official composition guidance.
Before upload, view the square crop at thumbnail size. The eyes should remain clear, the expression should feel natural, and the background should not compete with the face. Readers updating their wider professional presence may also find this StoryCV resume upload guide useful for keeping profile assets consistent.
Do one final check after cropping. A portrait that looked balanced in a tall canvas can become cramped in a square, especially when the hair or shoulders were close to the original borders.
Your Next LinkedIn-Ready Headshot in Nim
A credible LinkedIn AI headshot starts before generation. The best source is a clear phone photo with soft light, a natural expression, visible facial details, and enough space for a head-and-shoulders crop. The best result is the one that remains recognizable under side-by-side comparison, with realistic skin, intact accessories, coherent edges, and lighting that could plausibly come from a camera.
The final checkpoint is technical but simple. Use a square crop, keep the face prominent, preserve the shoulders and space above the head, and stay within LinkedIn's file guidance. If the portrait looks too smooth, too young, too symmetrical, or unlike the person on a video call, choose a better source and generate again instead of trying to hide the mismatch with more editing.
Open the Nim Mug shot template with the strongest phone photo available. Generate the portrait, review likeness before downloading, and use the Professional headshot workflow at Nim when a more formal presentation suits the profile.
Nim gives professionals a template-based way to turn a suitable source photo into a polished portrait and review the result before using it publicly. Visit Nim with a well-lit phone photo, then make likeness, artifact checks, and the LinkedIn crop part of the same practical workflow.
- linkedin ai headshot
- ai headshot linkedin
- professional headshot
- mug shot template
- nim ai photo