3D Floor Plan Walkthrough: A Practical Video Guide
Turn a 3D floor plan walkthrough video from a flat plan in Nim. Step-by-step prep, generation, review, and export tips for property listings.
By Nim
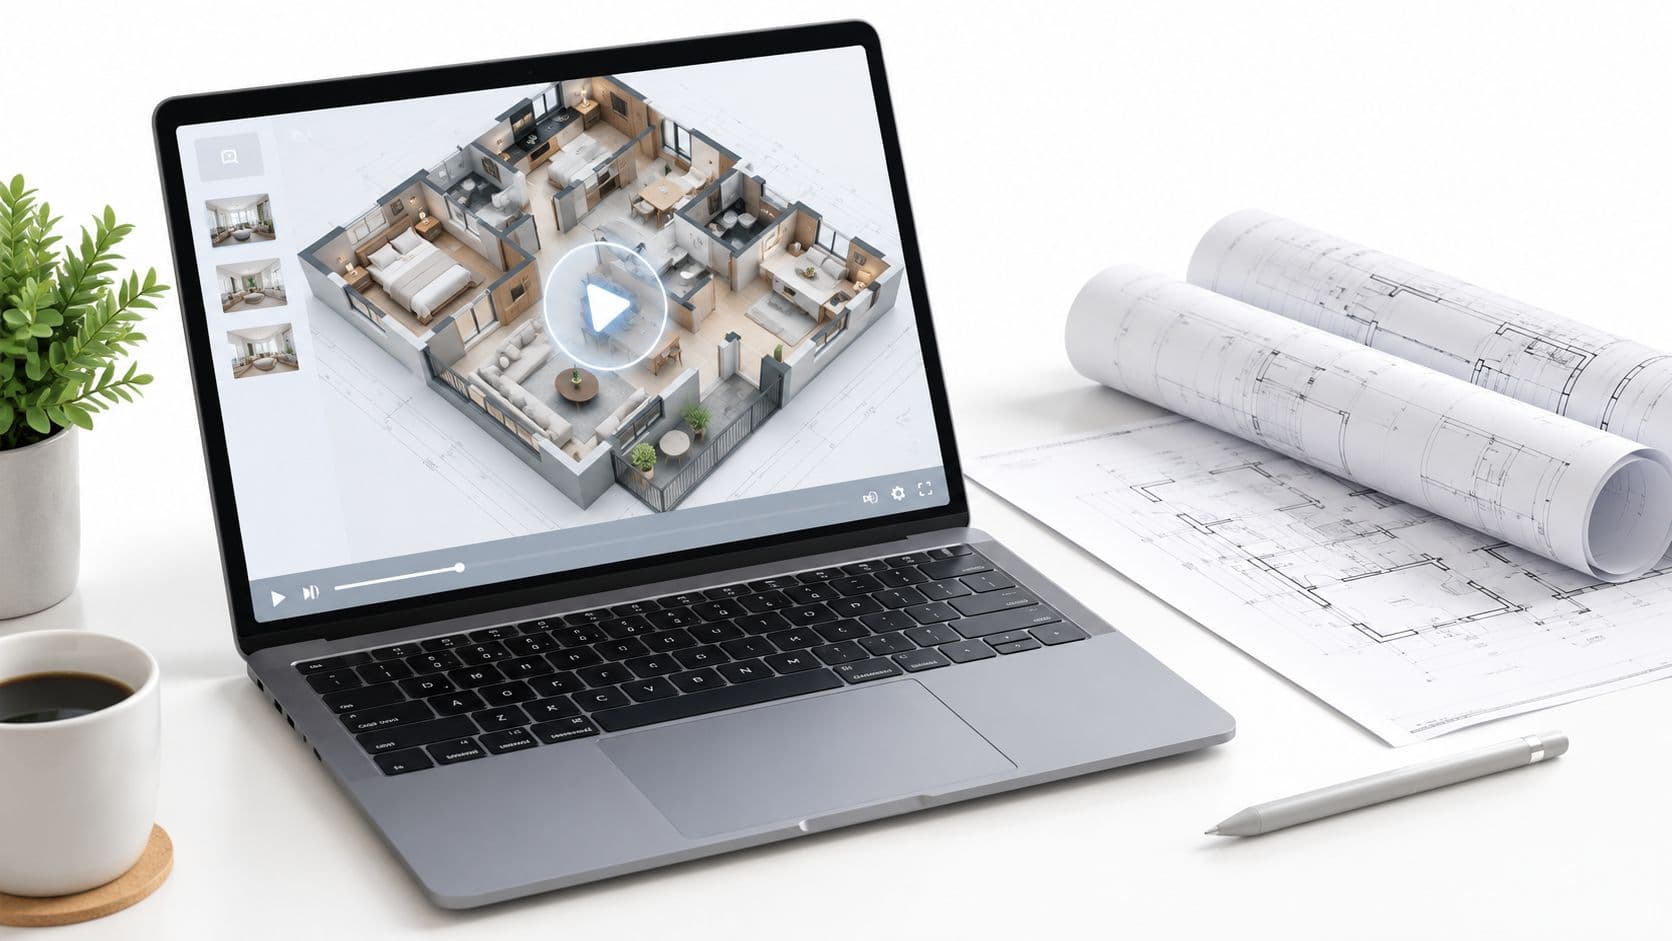
A property team can have a polished listing, a measured 2D plan, and strong photography, yet still struggle to make the layout understandable on a phone screen. Buyers may recognize the room names without sensing how the entrance leads into the living area, how the kitchen connects to dining space, or whether the bedroom corridor feels private.
A 3D floor plan walkthrough adds that missing layer. It turns a static plan into a short visual route through the property, giving viewers a sense of movement and spatial flow before they book a viewing. The practical workflow is simple: prepare a clean plan, add useful reference imagery, generate a first-pass video in Nim, inspect the path against the source, and only then adapt the clip for listing pages and social feeds.
When a Floor Plan Is Not Enough for a Modern Listing
A 2D floor plan still has an important job. It communicates measurements, walls, doors, and room relationships in a format that agents, buyers, and property professionals can refer back to. The problem is that technical clarity doesn't always translate into immediate visual understanding, especially when someone is scanning a listing on a small screen.
A walkthrough adds motion without replacing the drawing. The viewer can follow a route from the entrance into the main living zone, see how rooms connect, and build a mental picture of the property before investing time in an in-person visit. That makes the output useful as a marketing asset, not as a substitute for measured documentation.
The engagement case needs a realistic reading
Listings with 3D tours have been reported to receive 87% more views than listings without them, while a University of Texas at Dallas study of nearly 43,000 properties found that virtual tours reduced average days on market from 34 to 19, a 44% reduction. The same study found no increase in final sale price, so the strongest historical evidence concerns discovery and time on market rather than a guaranteed price premium. These figures are discussed in research on AR and VR real-estate walkthroughs.
That distinction matters for production teams. A walkthrough can help a suitable buyer understand the property sooner, and it can help an unsuitable buyer rule it out before requesting a viewing. It shouldn't be presented as proof that a listing will sell for more.
A separate review of 75,000 home sales found that virtual tours didn't significantly increase sale prices and could prolong time on market, even while helping buyers screen out unsuitable properties. The finding supports a more useful commercial position: the walkthrough may improve pre-qualification rather than increase conversion. The wider ROI of 3D property renderings discussion is useful when a team needs to assess the asset as part of a broader listing package.
Practical rule: Treat the video as a fast spatial introduction. Keep the original plan available for buyers who need exact orientation and measured detail.
The distinction between a 3D floor plan, an interactive tour, and a fixed-path video also matters. An interactive experience lets viewers choose where to move, while a video walkthrough guides everyone through the same selected route. For a listing team that needs a shareable clip today, the guided format is often easier to place in a social post, email, or property presentation.
Teams comparing formats can also review this explanation of turning a floor plan into a 3D model with AI. The useful question isn't whether one format is universally superior. It's whether the audience needs a guided impression, interactive exploration, or technical reference.
Preparing the Source Plan and Reference Imagery
The quality of the first walkthrough depends heavily on the material supplied before generation. A cluttered plan, inconsistent room references, or excessive blank space forces the system to interpret information that the production team could have clarified in advance.
Start with the source plan. Use the clearest available export, with walls, doors, windows, and room names legible at the working size. A vector PDF or a high-resolution PNG is generally easier to inspect than a compressed screenshot. If the source came from a CAD workflow, remove hidden layers that aren't relevant to the viewer and crop away title blocks, legends, and oversized margins.
Clean the plan before uploading
A short preparation pass should cover:
- Frame the layout tightly: Keep the outer walls prominent so the property occupies the image rather than sitting inside a large field of white space.
- Preserve orientation: Make sure the entrance and major circulation routes are easy to identify.
- Reduce visual noise: Remove notes, revision marks, and decorative elements that aren't part of the spatial story.
- Check legibility: Zoom into small labels and door swings before using the file. If a human reviewer can't read them, generated output may also interpret them poorly.
Don't add measurements that aren't present in the source, and don't use the walkthrough as a way to establish dimensions. Floor plans derived from Matterport scans can fall within a reported 97% to 100% accuracy range, depending on the camera, with one reported result only 0.97% away from the true floor area. Even that level of source accuracy doesn't make a generated video a measured record. The relevant floor-plan marketing research supports checking the plan independently before publishing.
Organize references around the route
Reference imagery helps communicate the intended visual character of each room. Gather the strongest available renders, architectural visualizations, or property photographs, then group them by space. Clear naming such as living_room_01 or kitchen_02 makes later review easier, even if the names aren't displayed in the final clip.
Keep the visual language coherent. A warm furnished living room beside a stark, cool kitchen render can make the generated sequence feel inconsistent. Before opening the template, write a short route in plain language:
- Enter through the front door.
- Reveal the living and dining area.
- Move toward the kitchen.
- Show the primary bedroom.
- Finish on a feature such as a balcony or large window.
This isn't a guarantee that the generated camera will follow every beat perfectly. It gives the first pass a clear editorial intention and makes the review stage more objective.
Opening the Walkthrough Template in Nim
With the plan and references prepared, open the Floor plan to video walkthrough template in Nim's interior-design template area. The template is designed for this specific conversion, so the team can begin from the prepared property material rather than assembling a general video workflow.
The confirmed process is deliberately short: provide the requested source material, generate the result, review the first pass, and download the usable output. The exact quality of that output still depends on the clarity of the plan, the relevance of the reference imagery, and the specificity of the written direction.
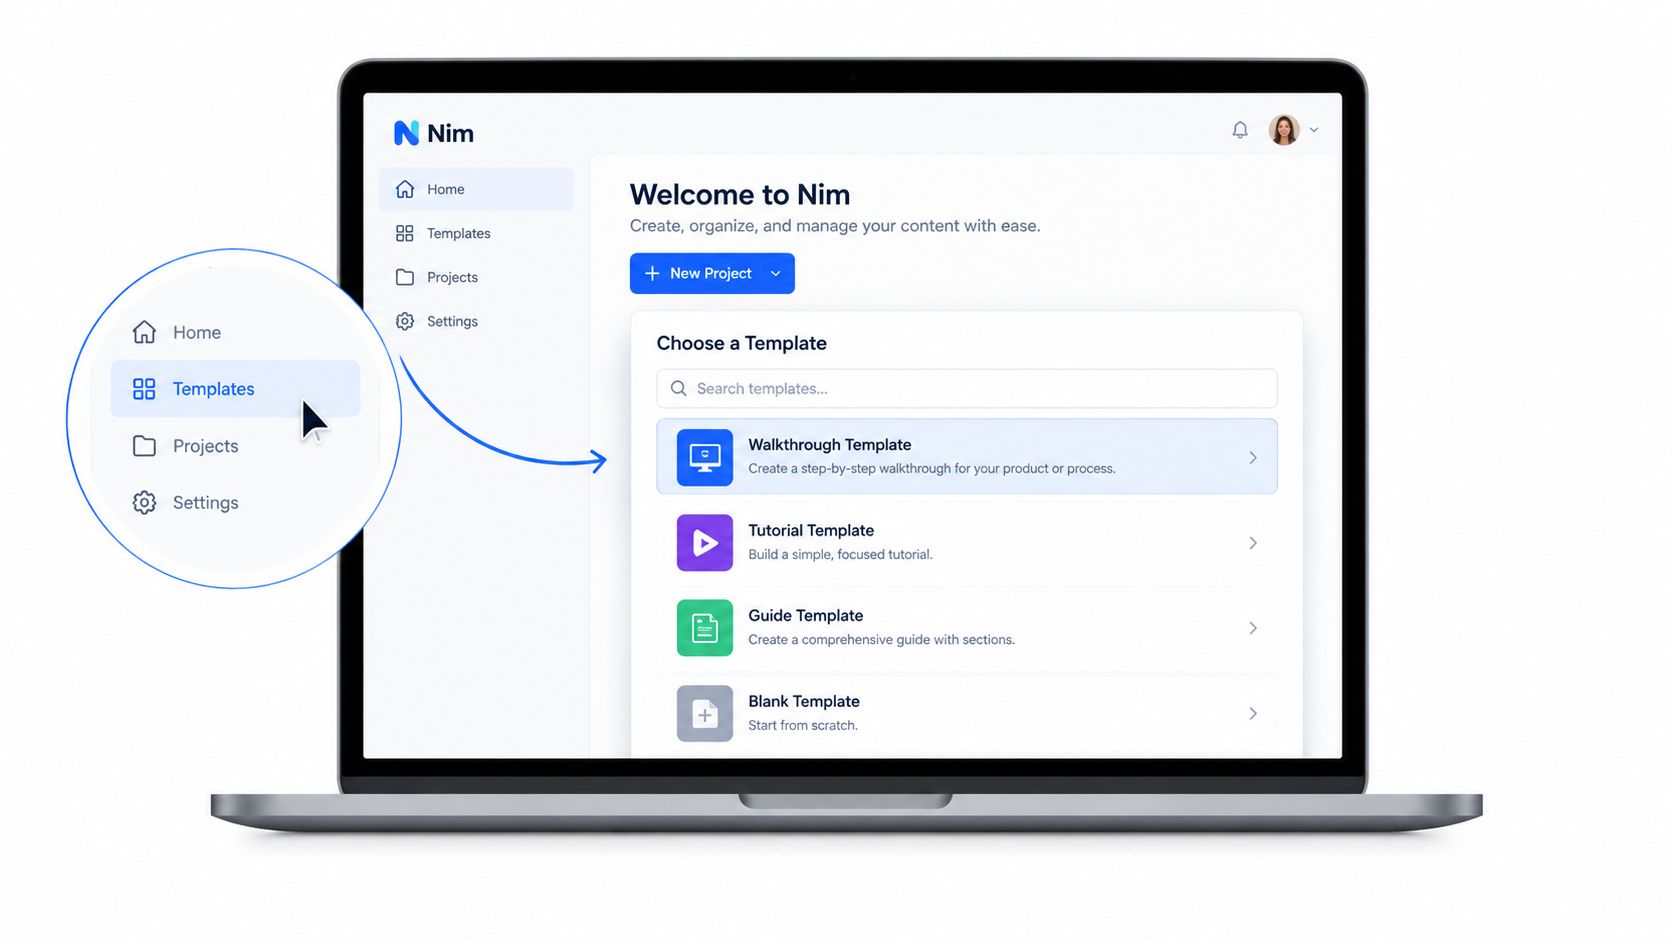
Supply the inputs with an editorial purpose
The source floor plan establishes the underlying layout. Reference images help define how rooms should appear, while a concise brief gives the generation a reasoned direction rather than an open-ended request.
A useful brief can identify:
- The property type and intended audience.
- The atmosphere, such as bright and airy or warm and intimate.
- The sequence of rooms that should receive attention.
- The feature that deserves a visual pause.
- Any important limitation, such as treating the result as a presentation rather than a measured reconstruction.
The camera beats prepared earlier should be included in that direction when the template accepts them. The wording should describe the desired route, not pretend to control an exact camera rig. For example, “begin at the entrance, move into the open living area, reveal the kitchen, then finish at the balcony” gives the system a coherent narrative without promising a precise path.
Generate a draft before judging it
The first output should be treated as a working draft. It gives the property team something concrete to inspect, which is more useful than trying to perfect every instruction before seeing how the plan translates into motion.
Avoid presenting the result as a verified digital twin. It is a visual approximation intended to communicate flow, atmosphere, and room relationships. The generated clip needs a human review against the original plan before it becomes part of a listing package.
Reviewing the Generated Camera Path and Visual Style
The review stage is where a plausible clip becomes a responsible marketing asset. Play the generated walkthrough while keeping the source plan available. The goal isn't to punish every stylistic interpretation. The goal is to identify errors that could mislead viewers or make the route difficult to follow.
Check the route as an editor
Use a simple room-by-room assessment:
- Entry point: Does the clip begin in a recognisable location?
- Sequence: Does the movement progress through the property in an order that makes sense?
- Connections: Do doorways and openings lead to the rooms shown next?
- Boundaries: Does the camera stay on the correct side of walls rather than appearing to pass through them?
- Hero features: Does the route give enough visual attention to the kitchen island, main bedroom, balcony, or other selling point?
- Ending: Does the final view leave the audience with a useful impression of the property?
A route can be visually attractive and still be wrong for the plan. For instance, a camera that jumps from the kitchen to a bedroom without showing the connecting corridor may create a misleading sense of adjacency. If the path misses a key room, the prompt or brief can be refined and the clip generated again.
The first render answers a production question: does this route explain the property clearly enough to share?
Separate style decisions from layout decisions
Lighting and material treatment influence how viewers read scale. Bright, even lighting can make a commercial shell feel open, while warmer tones may suit a furnished residential listing. Those choices should support the property rather than distract from it.
Look for visual drift during playback. Floating furniture, changing wall finishes, inconsistent window placement, or a room that shifts character between cuts can weaken trust. A small stylistic variation may be acceptable in a mood-led promotional clip. A change that alters the apparent room structure isn't.
This is also the point to decide whether another generation is necessary. Refine the direction when the camera misses the intended route or the style contradicts the listing. Accept the result as a visual impression when the layout reads correctly but the imagery remains illustrative. A practical AI real-estate video guide can provide wider context for judging presentation choices, but the source plan remains the authority for the property details.
Don't describe the clip as dimensionally accurate unless a qualified process has verified it independently. The safest label is plan-led walkthrough visualisation.
Exporting and Adapting the Clip for Social Platforms
Once the path and visual treatment have passed review, the clip can be adapted for the places where buyers will encounter it. Distribution should preserve the route's clarity. A fast crop that removes the entrance or cuts between unrelated rooms may create more confusion than engagement.
Choose the framing around the destination. Vertical presentation usually suits mobile-first feeds, square framing can work within compact carousel layouts, and widescreen placement remains useful for agency websites or presentations. The source clip should remain untouched while platform-specific versions are prepared outside the generation workflow.
Build the edit around the strongest sequence
The most useful cut usually follows a simple narrative:
- Establish the entrance or overall orientation.
- Move through the main living area.
- Show the kitchen or strongest shared space.
- End with the primary bedroom or a distinctive feature.
A caption naming each room as it appears can help viewers follow the route without narration. Keep text away from doors, windows, and other spatial signals. If the clip needs trimming, remove repetitive movement before removing the opening orientation or the final feature.
The property team should also keep a clean master separate from versions with captions, logos, or platform-specific crops. That preserves the original asset for listing pages, email follow-ups, presentations, and future edits. Guidance such as iHatePosting's social media scheduling tips can help with publication planning, but it doesn't replace checking each finished crop on the intended channel.
Pair video with the plan
The walkthrough shouldn't carry every technical detail. Place the original 2D plan alongside the clip wherever the listing format allows it. The video gives a sense of movement and atmosphere, while the plan helps a serious viewer confirm orientation and room relationships.
For teams building other short-form property assets, the AI UGC video generator guide is a separate reference. It shouldn't be treated as part of the floor-plan workflow. The production principle is the same, though: create the core visual first, then adapt it deliberately for each audience and placement.
Your Next Step in Nim
The most efficient next move is to return to the Floor plan to video walkthrough template with a clean plan, a small set of relevant room references, and a short route brief. The target isn't a perfect reconstruction on the first attempt. It's a reviewable draft that shows whether the entrance, living zone, kitchen, bedroom, and feature space read in the right order.
A useful production cycle looks like this:
- Prepare the source plan and remove distracting material.
- Add references that support the intended room style.
- Describe the route in plain language.
- Generate the first walkthrough.
- Compare the movement with the original plan.
- Refine the direction if the path misses a room or creates a misleading connection.
- Keep the approved clip alongside the original plan in the listing package.
The distinction between visual communication and technical documentation should remain clear. A walkthrough can make a flat plan more accessible and more shareable, but it won't replace measured drawings, inspection material, or verified property information. Its strongest role is to help a prospective buyer understand the flow quickly and decide whether the property deserves closer attention.
The same judgment applies to performance. Virtual tours have been reported to generate 49% more qualified enquiries than floor-plan-only listings, while interactive floor-plan experiences have been reported to add about 45 seconds of average viewing time and virtual tours to hold attention for 3 to 5 minutes. These figures come from independent guidance on floor plans and virtual tours, and they should be treated as reported industry findings rather than a promise for every property.
The practical test is simple: can the viewer understand the route, recognise the important rooms, and decide whether to continue? If the answer is yes, the 3D floor plan walkthrough has done its job as a focused marketing asset.
Nim offers a Floor plan to video walkthrough workflow for turning prepared property plans and reference imagery into a reviewable walkthrough draft. Visit Nim to start with the template, check the generated route against the source plan, and prepare a shareable property video.
- 3d floor plan walkthrough
- floor plan video
- real estate video
- nim walkthrough
- property listing