Talking Object AI: How to Make Any Product Speak
Learn how to use talking object AI in Nim's Lip Sync template to turn product photos and props into lip-synced talking videos, from source prep to export.
By Nim
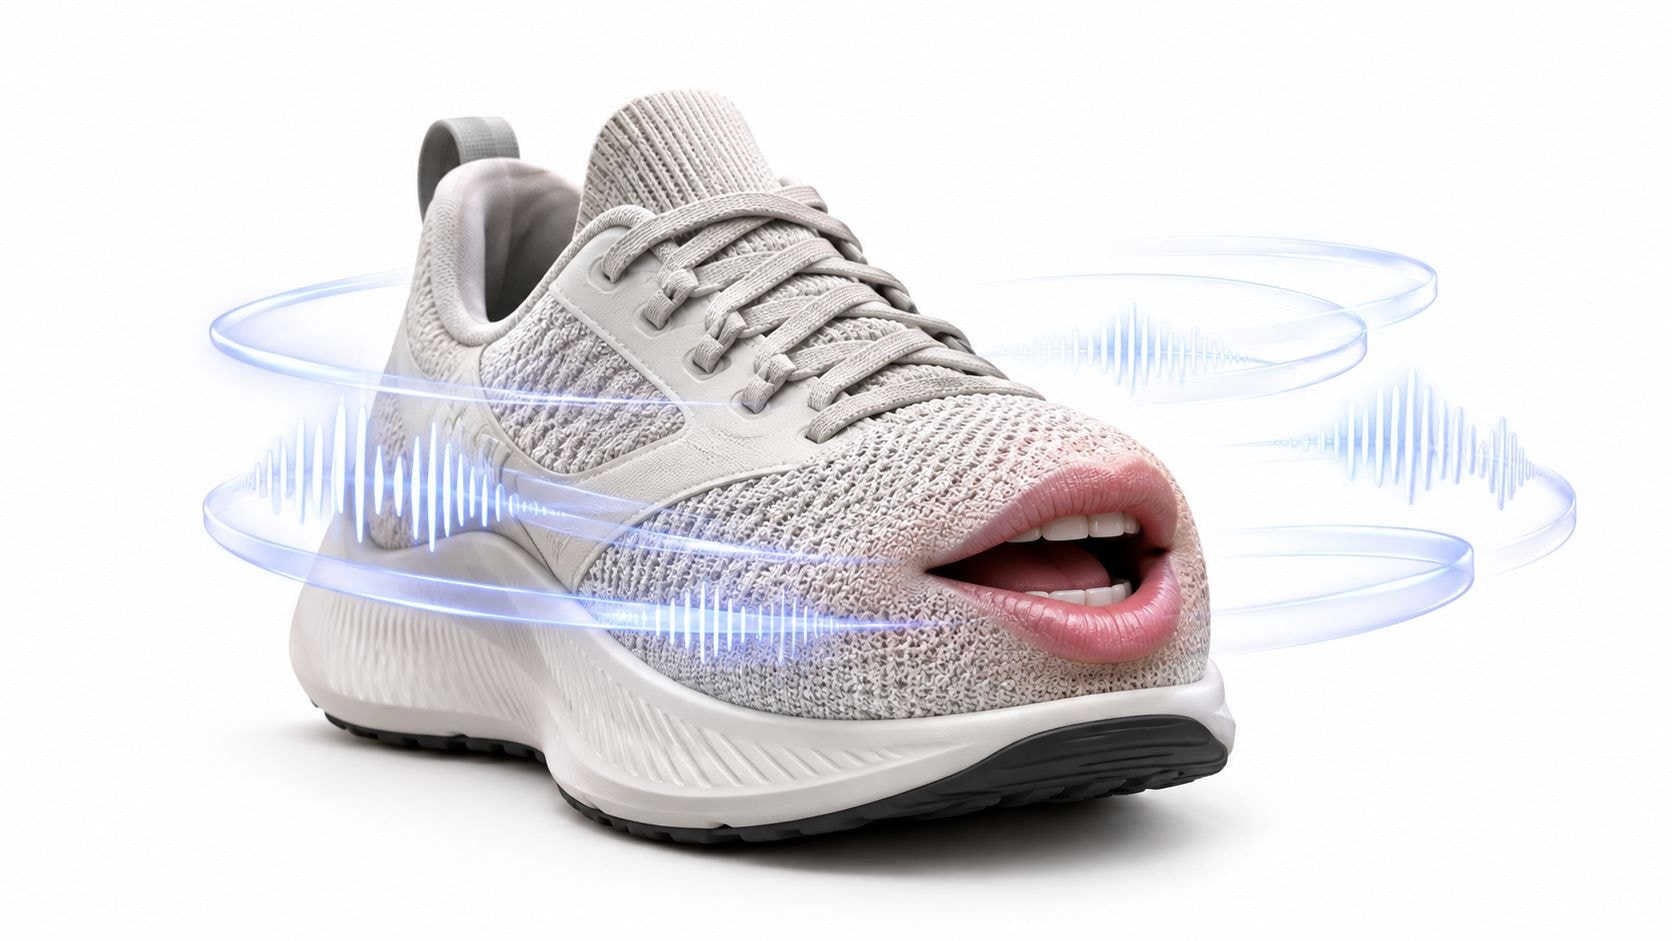
A product photo can look polished in a catalog and still become an awkward talking object the moment lip sync is applied. Reflective packaging catches strange highlights, a logo bends across the supposed mouth, or the model animates a corner that never made sense as a face.
Talking object AI works best when the source image is prepared for animation rather than treated as an ordinary product listing photo. Nim's named talking object workflow can turn a single product image and an audio track into a short clip in which the object's mouth area moves with the supplied speech. The practical process is simple, but the quality depends on choosing the right image, keeping the audio concise, and reviewing the result critically.
What Talking Object AI Does in Nim
An e-commerce seller may already have the product image and voiceover ready, but still need a short video in which the product appears to speak. Nim provides a dedicated talking object template for that use case, using lip-sync technology rather than requiring a traditional animation workflow.
The output is a video of the selected object with movement concentrated around a generated mouth area, timed to the supplied audio. The core inputs are a source image and an audio track, so the preparation work happens before generation: select one clear product photo, choose speech that matches the intended tone, then submit both inputs through the template.
The workflow should be treated as input, generate, review, and download. It isn't a replacement for product photography, voice direction, or quality control. A clean source may produce a convincing result quickly, while a cluttered or highly reflective image can require a revised source image and another generation.
Start with one object
One product gives the model a clearer visual subject and reduces uncertainty about where speech should appear. A single bottle, shoe, package, or tool is easier to evaluate than a group of products sharing the frame.
Match the image to the intended character
The source image establishes the object's visual identity. A front-facing package can support a direct, presenter-like delivery, while a side-angle shoe may suit a more expressive character but gives the model less obvious space for a mouth. The audio should reinforce that choice instead of asking a stiff product shot to perform complex acting.
The format has older roots. The Computer History Museum's chatbot history describes speech interaction in toys as early as the 1890s, Speak & Spell bringing speech generation into consumer products by the 1960s, and Furby becoming a mass-market milestone in 1998. Modern talking-object video combines those older ideas with generated speech, image animation, and short-form video production.
Preparing a Source Image That Animates Well
The source image is the largest quality lever because the model has to infer both where the object should speak and how the surrounding geometry should move. An isolated, well-lit, front-facing image of one object gives it fewer competing interpretations.
Lighting matters because dark regions can merge with shadows, while bright reflections can look like moving facial features. A front-facing product presents a more stable surface for mouth placement. A closer crop helps when the object's face is the focal point, but the crop shouldn't cut off the shape that makes the product recognizable.
Remove or avoid text and logos in the likely mouth area if they may warp during animation. The same principle applies to handles, straps, lids, fingers, foliage, or other elements crossing the intended face. If the source is soft or poorly exposed, separate image preparation may help before the talking-object pass. A broader guide to image-to-video AI can help when the project needs image animation beyond a single speaking-object treatment.
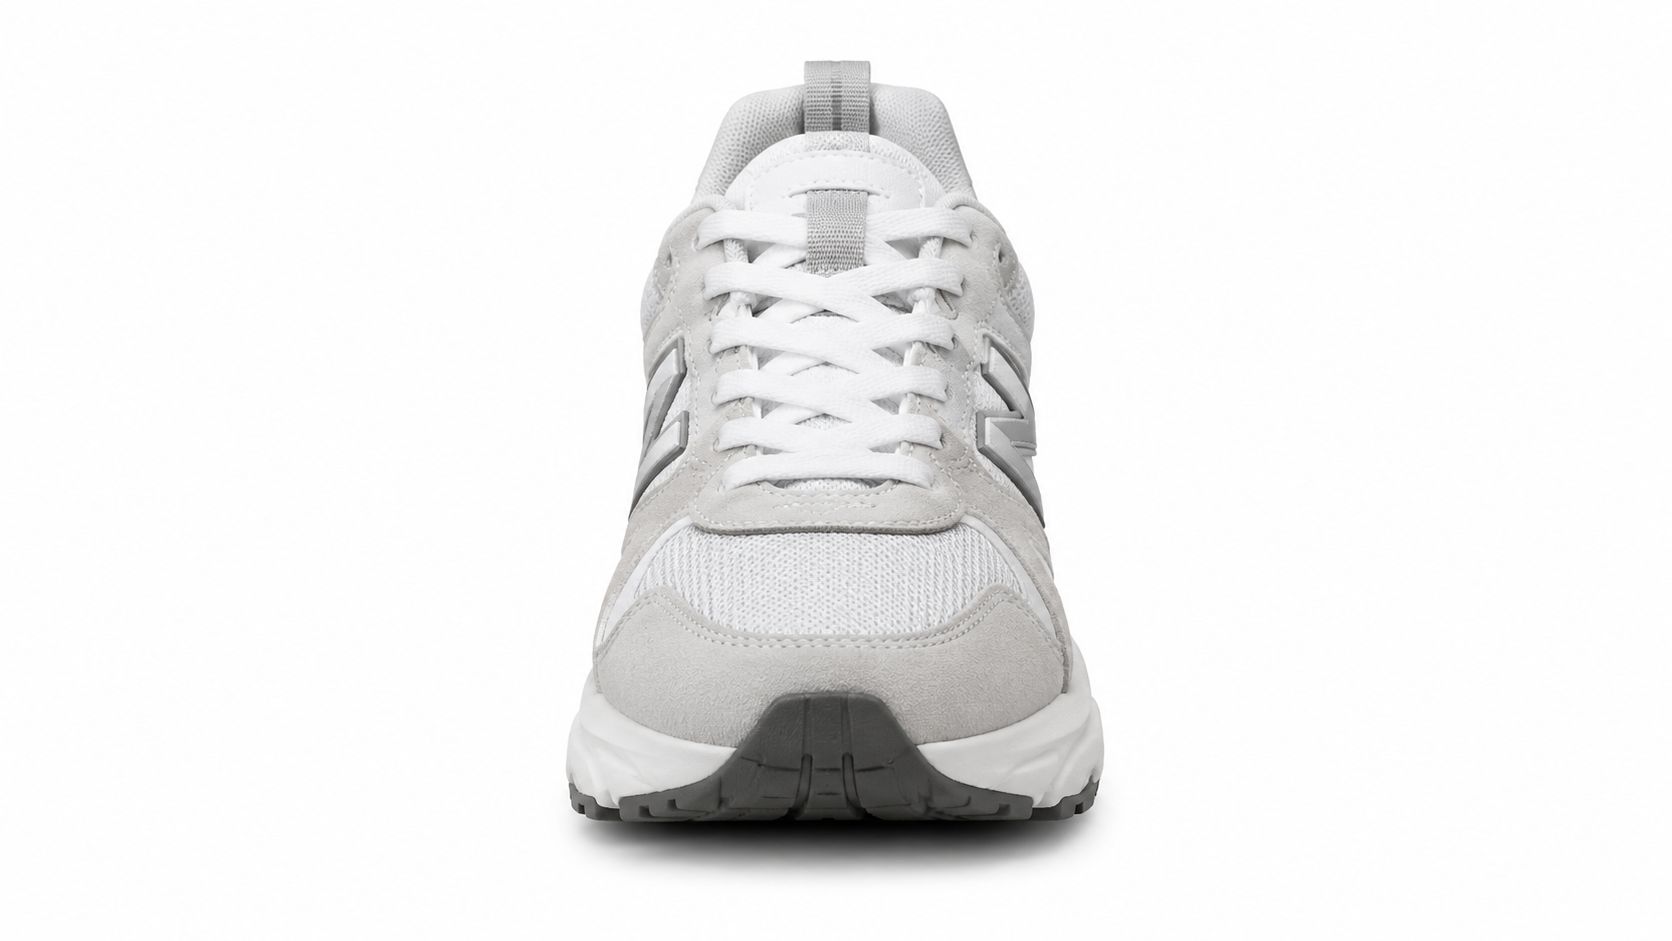
A sneaker is a useful example because its toe box, side panel, laces, and sole create several plausible “faces.” A front-facing toe shot gives the model a clearer candidate area than a busy three-quarter image with laces crossing the center. For a bottle, the label may suggest a face, but a glossy curved surface can distort the result unless reflections are controlled.
Source Image Problems and How to Fix Them
| Source image issue | Why it hurts animation | Prep fix |
|---|---|---|
| Reflective packaging | Highlights can be mistaken for facial features or may warp around the mouth | Use softer, more even lighting, reduce glare where possible, or re-shoot |
| Ambiguous object shape | The model may choose a corner, seam, label, or edge as the mouth | Use a front-facing crop with one obvious focal area |
| Text or logos across the face | Letterforms can bend or melt during mouth movement | Move the text away from the likely mouth area or choose another image |
| Multiple products in one frame | The model may distribute attention across several subjects | Isolate one product before upload |
| Partial occlusion | The hidden geometry gives the animation fewer visual cues | Remove the obstruction or re-shoot the product unobstructed |
| Very wide composition | The mouth becomes small and motion is harder to judge | Crop closer when the object is the story's main character |
| Oddly shaped product | There may be no natural facial region | Test a simpler angle, then re-shoot if placement remains unstable |
A clean background helps, but it isn't enough on its own. The object also needs a coherent surface around the intended mouth area. A reflective pouch, a transparent container, or a product photographed behind another item may need a different shot rather than more prompting.
Practical rule: If a human viewer can't identify the intended face in the still image, the animation model probably won't identify it consistently either.
Running the Lip Sync Template With Your Audio
A product photo can look convincing until the first spoken line makes the mouth jump onto a glossy highlight or drift across a label. Start with the prepared image and the audio that will control the speech, then open the Lip Sync template, upload both inputs, generate the clip, and download it only after checking the result.
Choose the audio deliberately. A recorded voiceover gives tighter control over personality, pauses, and timing. Generated speech makes it faster to test alternate deliveries. Either option needs clear articulation, limited background noise, and a short script. Long sentences, rapid delivery, and crowded sound can make a small product mouth difficult to read.
Set the rhythm before judging the render
Speech rhythm changes how the animation feels. Fast delivery can make the mouth look frantic, while extended pauses may leave the product nearly motionless. A bottle introducing itself or giving one practical instruction generally needs less dialogue than a scripted scene with several emotional changes.
Record or generate a clean first take before adjusting the image. If the audio has awkward pauses, rushed words, or sharp changes in volume, fix those issues first. Otherwise, it becomes difficult to tell whether an ugly result comes from the source photo or the performance.
Generate, then inspect the whole clip
Generation is only the first pass. Watch from the opening frame to the final word, because reflective packaging may hold together early and break when the mouth opens wider. Clutter behind the product can also make edges appear to move, especially when the background contains similar colors or strong shapes.
Check four points:
- Is the object still recognizable? Labels, edges, and proportions should remain coherent throughout the clip.
- Does the mouth stay on a plausible surface? A mouth that floats beside a pouch or cuts through a container usually indicates unstable placement.
- Does motion follow the audio? Look for early stops, delayed movement, or animation that continues after the speech ends.
- Does the performance suit the format? A product demonstration may need restrained motion, while a comedic short can support broader expression.
If the result fails, change one input at a time. Try a cleaner audio take before replacing the image, then test a tighter crop or a different product angle if placement remains unstable. Reflective highlights, transparent surfaces, and busy backgrounds often require a better photo rather than more prompting.
The supported workflow is straightforward: supply the image and audio, generate the clip, review it, and download an acceptable take. Avoid assuming that the template provides fine-grained controls unless they are visibly available.
Reviewing Mouth Placement and Motion Quality
Quality control should focus on geometry first and performance second. A generated clip can be technically synchronized and still look wrong because the mouth landed on a label, a sharp edge, or an empty patch beside the product.
Start with a paused frame. Identify the product's front, the surface that faces the viewer, and the area where a mouth would be visually acceptable. Then play the clip and watch whether that area stays attached to the object as the animation changes. If the mouth appears to slide, stretch across separate surfaces, or detach from the product silhouette, the source image is not giving the model a stable enough visual cue.
A related photo animation guide is useful for understanding the broader principle: image animation works more reliably when the still image gives the system clear structure to preserve. Talking-object clips add the extra challenge of synchronizing movement with speech, so small source-image weaknesses become more visible.
Separate emotion from physical complexity
Heavy motion prompts or overly ambitious acting can overdrive the face. A product doesn't need a wide mouth, head movement, several gestures, and changing emotions in one take. Complex geometry, glossy surfaces, and narrow edges already create enough uncertainty.
Use one emotion and one gesture per take. A mildly annoyed bottle can tilt or pulse with its speech, while a proud sneaker can receive a small emphasis movement. Reaction shots, cutaways, or separate product views can carry the rest of the story without forcing every action into the talking-object frame.
A stable, restrained performance usually looks more intentional than a highly expressive one that breaks the object's geometry.
Decide whether to iterate or re-shoot
Iteration is normal, especially when the subject isn't a simple household object. The first review should distinguish between an input problem and a motion problem:
- If the mouth is in the wrong location, revise the crop, angle, obstruction, or object isolation.
- If the mouth is correctly placed but moves too aggressively, simplify the audio's emotional delivery and reduce the intended action.
- If reflections or labels deform, prepare a less reflective or less crowded source image.
- If the product contains several competing shapes, test a closer view that gives one surface visual priority.
- If the same defect persists across a cleaner image and simpler audio, a different source photo may be more efficient than repeated generation.
The practical iteration loop is narrow: improve the confirmed inputs, run the template again, and compare the result. It isn't a hunt for nonexistent controls. The creator should judge whether the revised source makes the object easier to understand before spending time on another take.
Optional Prep and Post-Production for Short-Form Delivery
A polished product photo can still produce an awkward talking-object clip. Reflective glass may warp around the mouth, a label may be mistaken for facial detail, and a second item in the frame can attract the animation. Prepare the image before running Nim's lip-sync workflow, then keep post-production separate from the object animation.
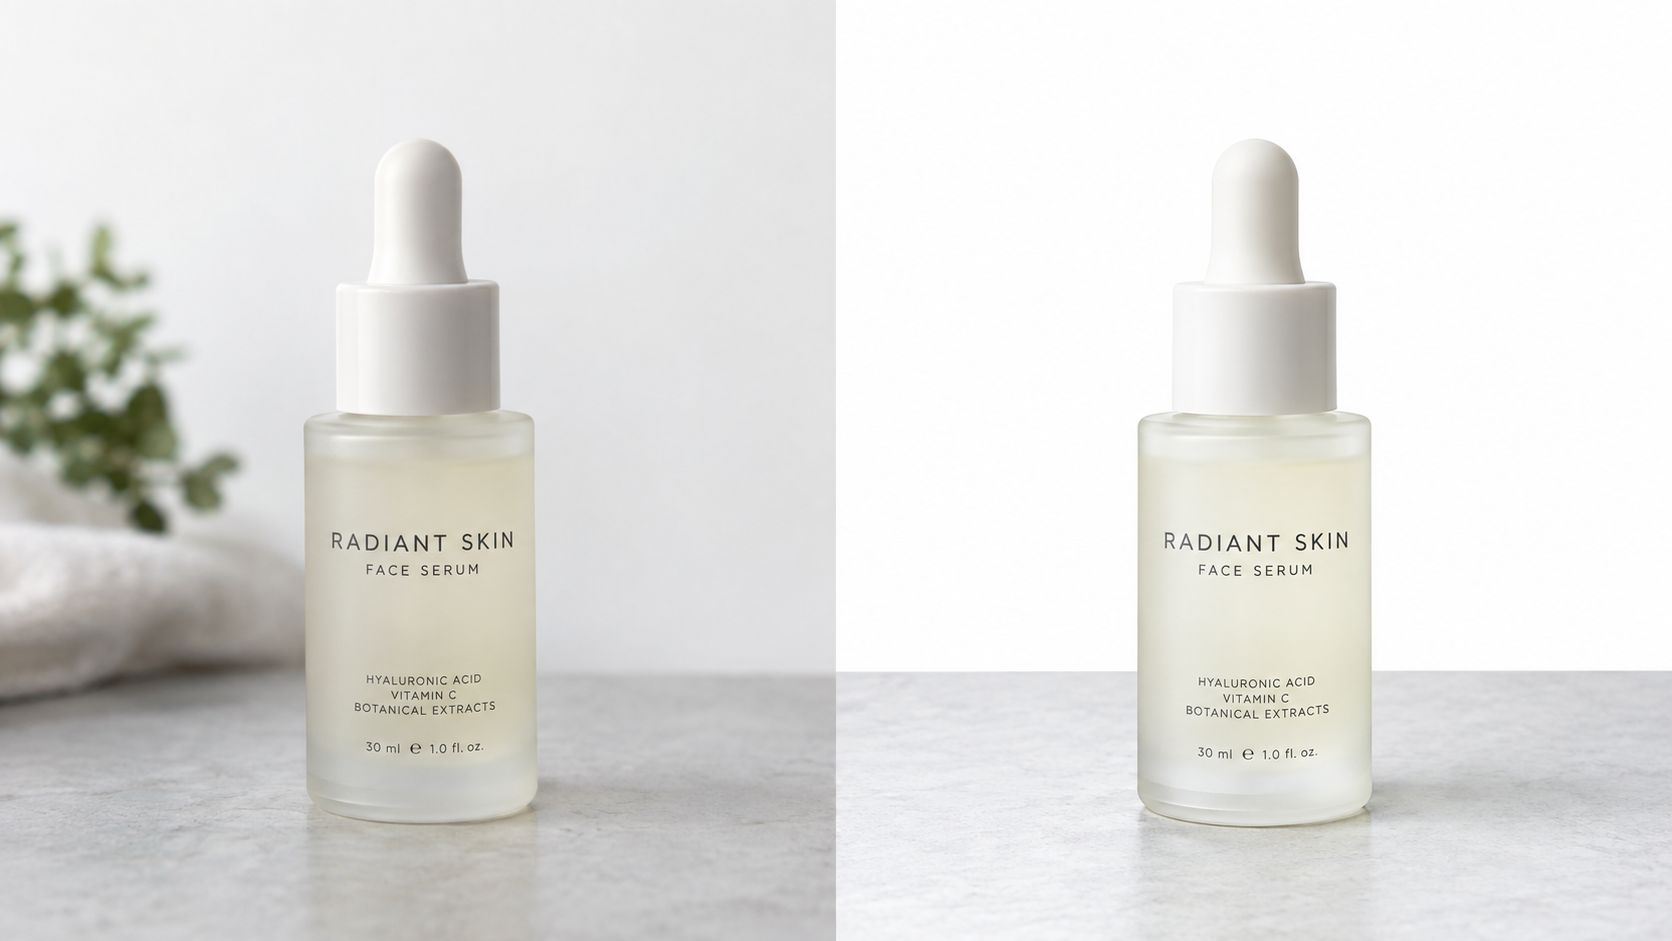
A serum bottle shows the problem clearly. Its glass reflects the room, its label contains information that should remain readable, and the second bottle competes with the intended speaker. Isolate one bottle, keep the likely mouth area clear of text, and crop tightly enough to preserve the silhouette. If the surface is highly reflective, test a less reflective photo rather than expecting post-processing to repair every deformation.
Build the script for the frame
The audio needs a simple rhythm that gives the mouth room to move. Use a compact four-part structure:
- Setup: Identify the object or situation.
- Complaint: Give the product a specific problem.
- Escalation: Make that problem more vivid.
- Tag line: End with the memorable point.
Keep the total script under 50 words so the mouth movement remains readable in a short clip. A skincare bottle could say it has been left in a dark drawer, complain that nobody reads the label, highlight the missed routine, and finish with a direct reminder. Match the wording to the brand, but avoid several emotional shifts in one take. Dense copy gives the animation too many speech changes to represent cleanly.
Prepare the final mobile frame
The talking-object pass creates the speaking moment. Reframing, captions, and broader edits belong afterward. If the generated video is horizontal, crop the finished clip to 9:16 for TikTok, Reels, or Shorts. Check the crop around the mouth and label, because a mobile frame can remove the visual context that made the product recognizable. Burn in captions when the clip needs to work without sound.
For a longer product video that needs several social versions, see how Klap generates social clips for the clipping stage. Keep that work separate from lip sync. Review each selected segment for mouth placement, reflective-surface warping, and label legibility before publishing. A clean short clip is better than a rushed crop that makes the product look altered.
Your Talking Object Workflow Checklist
Use this checklist before each talking object run:
- Choose one object: Start with a clear product photo. Check that the product is recognizable and the intended mouth area is visible.
- Clear the face area: Remove clutter, hands, or packaging features that could compete with the mouth. Avoid placing it over key text or logos.
- Check the geometry: Reflective wrapping, odd shapes, partial occlusion, or an ambiguous mouth location can produce ugly warping.
- Prepare the audio: Use clear speech, one emotion, and a concise script.
- Run the template: Supply the image and audio, then generate.
- Review the clip: Check lip placement, synchronization, motion, reflections, label legibility, and product recognizability.
- Iterate deliberately: Change the crop, source image, or audio when the mouth drifts. Test one change at a time instead of searching for controls that may not exist.
- Finish separately: Prepare backgrounds or enhancements if needed, then reframe and caption outside the template.
For human subjects, use Nim's talking model workflow. For broader product concepts, the UGC ads template library offers another starting point.
Run one product photo end to end today. Review the result before expanding to more variations.
Nim offers a dedicated talking-object workflow that combines a prepared product image with an audio track for a lip-synced clip. Visit Nim, then test the input, generation, review, and download steps.
- talking object ai
- lip sync video
- AI video templates
- product video
- Nim video